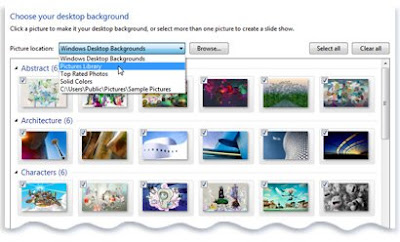
Create Slide Show Using your own Picture
1.Find the pictures that you want to include in your slide show. All of the pictures must be located in the same folder.
Open Desktop Background by clicking the Start button Picture of the Start button and clicking Control Panel. In the search box, type desktop background, and then click Change desktop background..
2.If the pictures that you want to use aren't in the list of desktop background pictures, click the Picture location list to view other categories, or click Browse to search your computer for the folder where the pictures are located.
 3. Select the check box for each picture that you want to include in your slide show.
By default, all of the pictures in a folder are selected and will be part of the slide show. If you don't want all of the pictures in the folder to be included, do one of the following:
- Press the Ctrl key, and then click each picture that you want to remove. Only the selected pictures will appear in the slide show.
4.Do one or more of the following:
1.Click an item in the Picture position list to crop the pictures to fill the screen, fit the pictures to the screen, stretch the pictures to fit the screen, tile the pictures, or center the pictures on the screen.
2.Click an item in the Change picture every list to choose how quickly the slide show changes pictures.
3.Select the Shuffle check box to have the pictures appear in a random order.
5. Click Save changes.


No comments:
Post a Comment